One-liner for downloading music files from a Podcast feed, with grep, sed and wget

Premise

I like to listen to music while I code and usually it’s in the form of online radio or a podcast. I believe most portable music players have the ability to sync with podcast feeds nowadays, but I’m an old fashioned guy and sometimes I like to have the music files readily available on my own hard-drive, so I can move them about as I please.

Command

As an example, here is a feed from Tiësto’s club life, on podcast I listen to quite a lot:

http://www.radio538.nl/clublife/podcast.xml

Download it and the run this command:

  grep -E "http.*\.m4a" podcast.xml | sed "s/.*\(http.*\.m4a\).*/\1/" | xargs wget

This is a three step command, that does the following:

  • Extracts all lines, that contains the .m4a file urls using grep.
  • Strips all characters that are not part of the urls.
  • Feeds each line to wget one by one

Ofcourse this is very rudimentary and could easily be transformed into a more general purpose tool in a script. Setting for instance file types via parameter, or even avoiding having to download the feed file first. But this solved the job at hand for me.

Feel free to adapt in any way you please.
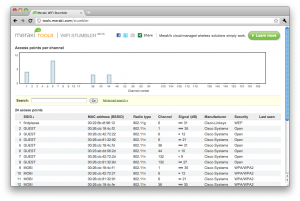
Web based WIFI analyzer

Update Jan. 11th 2017: The web version of the stumbler is no longer available. An Android app is all that remains; available from Google Play store: https://play.google.com/store/apps/details?id=com.meraki.wifistumbler.


If you’ve ever felt that your wireless was a tad bit sluggish, one of the reasons might be because of interfering signals from your neighbours. Choosing the channel with the least amount of interference is thus the way to go, if you want a good strong signal.

Obviously there is a ton of WIFI analyzer programs out there, but who would bother if you could just open up your browser and do it without needing to install anything?

Enter Meraki Tools | WIFI STUMBLER:

URL: http://tools.meraki.com/stumbler

Essential software for a fresh installation of Mac OS X

Following my recent decision to upgrade to Snow Leopard, being a bit old fashioned I decided a clean install would best quell my OCD. That of course means figuring out, what all those nifty little programs you’ve picked up along the way was.

Granted, this is rather a matter of personal preference, here is a short list of software I think is must have’s on a clean install of OS X:

  • Quicksilver
    Is a tool for accessing everything on your Mac incredibly fast. Just press Ctrl + Space, type a few letters of the title of the thing you need to find or open. Press Enter and voila.
  • Caffeine
    Is a little background application that allows you to toggle screen dimming. It puts a little icon in your task bar, that you just click whenever your want to watch a youtube clip or similar, where the screen dimming would otherwise be activated.
  • MacPorts
    Is a package manager for OS X, which gives you access to all kinds of open source software, that doesn’t ship with OS X. MacPorts relies on XCode being installed for a compiler, which can be installed from the OS X installation DVD. When it’s installed, using it is as simple as issuing the command:

    sudo port install

    Wait for it to finish compiling and installing and then you can run the program directly from your command-line.

  • Cyberduck
    A really good lightweight FTP client.
  • Adium
    For all your instant messaging needs. Handles most of the networks out there. No Skype support though.
  • Perian
    A collection of codecs that aren’t natively supported. If you want the preview feature in Finder to work, as well as QuickTime playback on non-supported file types, this is what you need.

Installing Mac OS X from a USB Disk

I have a Macbook Pro which is a couple of years old and signs of age are starting to show. I wanted to upgrade to Snow Leopard recently, but the SuperDrive just isn’t working very well anymore. Whenever I tried to boot from the installation DVD, it just made a couple of disgruntled noises and then spat out the disc.

I’ve had this issue before with some mediums it couldn’t read. Sometimes it helps just reinserting it a couple of times and eventually it will start reading the disc. Not this time around though. After trying about 6-7 times, my patience had the better of me.

Luckily I’ve found a workaround and it is dead simple.

  • Grab one of those spare USB drives you have lying about anyway.
  • Create a new partition of say 8GB with Disk Utility.
  • Clone  the Mac OS X install DVD onto that partition.
  • Reboot with the drive attached to your Mac.
  • Install Mac OS X.

The details of how to do it can be found in this blogpost.

Server crash

My server decided to kill of one of my disks yesterday. Unfortunately it was the disk that housed the VM I do all my hosting on. I did manage to migrate the few sites I had backups of, but not this blog and stupid me didn’t do a backup of the blog database.

No reason the cry over spilled milk, it was just a few posts anyway. I will try to recreate them though. Hopefully Google can provide some cached versions.