Behind the scenes of shell IO redirection

In the day to day toils on a command-line, it can be easy to overlook the complexities behind many of the constructs you use all the time.

In a POSIX shell, one such construct is the ability to pipe between, as well as redirect input and output of various commands with <, > and |.

Let’s stop and smell the roses, and ask; How does this actually work?

As an example, have you ever wondered, what happens under the hood, when you write a command like this?

cat foo.txt > bar.txt

That’s what we’ll take a look at in this post.

dtruss

In order for us to look into the belly of the beast, so to speak, we’ll need a tool to monitor system calls for a given process.

Since I’m doing this on an OS X system, the tool of choice is dtruss, a DTrace version of truss. On Linux strace can be used instead.

If you’re not interested in trying this out for yourself, skip on ahead to the Inspection section.

Preflight checklist

By default dtruss doesn’t work because of the System Integrity Protection (SIP), security feature of OS X. If you try to attach to a running process, you’ll get this error message from dtrace initially:

$ sudo dtruss -f -p 43334
dtrace: system integrity protection is on, some features will not be available

And then the log will be filled with dtrace errors like this, as soon as the process makes any system calls:

dtrace: error on enabled probe ID 2633 (ID 265: syscall::ioctl:return): invalid user access in action #5 at DIF offset 0

In order to work around this problem, it’s possible to disable SIP for dtrace exclusively. Reboot OS X in recovery mode and enter the following command in a terminal:

csrutil enable --without dtrace

You’ll see the following warning message:

This is an unsupported configuration, likely to break in the future and leave your machine in an unknown state.

That’s ok for now. Restoring the default configuration later can be done with:

csrutil enable

Reboot to normal mode again and open a terminal.

Noise reduction

To reduce the amount of unrelated events in the output from dtruss, it’s a good idea to run commands in a minimal environment without various hooks and other modern shell niceties.

Starting up, e.g. a new instance of bash, without inheriting the parent environment and loading a profile or rc, can be done like so:

env -i bash --noprofile --norc

Take-off

In the minimal bash instance just started, get the process ID of the shell:

bash-3.2$ echo $$
529

Now we’re ready to start monitoring. Open up a separate shell; note this doesn’t have to be minimal like above. Start up dtruss, attaching it to the bash process:

$ sudo dtruss -p 529 -f

The -f here makes sure any forked children is followed as well. If all went well, you’ll see this header appear:

PID/THRD SYSCALL(args) = return

Now we’re ready to issue our command with output redirection.

Run

I’m using the following small test file in this example, but any file will do really:

Back in our minimal bash shell, we’ll issue this simple command, redirecting stdout to the file bar.txt:

cat foo.txt > bar.txt

Now let’s take a look at what dtruss has picked up.

Inspection

After running the command, we should see a lot of stuff in the log output from dtruss.

The full output I got from dtruss can be found in this gist. For a better overview, I created a filtered version with irrelevant system calls omitted:

grep -v -E "ioctl|sigaction|sigprocmask|stat64|mprotect" dtruss.log > dtruss.short.log

Here’s the shortened version:

Target file

Quickly skimming the log reveals, that we’re looking at two different process ID / thread ID pairs. Namely 1436/0x5b3d on lines 1-5 and 36-39, as well as 1458/0x5c1d from 6 to 35.

The reason for this, is that the shell utilises a fork-exec approach, for running program binaries, e.g. cat, or anything that isn’t a shell builtin really.

The way it works, is by the parent process, in this case 1436, calling fork. This makes a copy of the current process and continues execution in both, albeit with some important differences.

In the child, fork returns with a value of zero and in the parent, it returns the process id of the forked child. That way it’s determined which of the two will subsequently transform into a new process through one of the exec family of system calls. In this case the dtrace probe is unable to properly trace it, but on line 21 we see an error for an execve call, so that is most likely the one in this case.

From line 6 the log output is coming from the child process. The first lines of interest here is 11-13. Let’s look at them one at a time.

On line 11, we can see an open system call for the file bar.txt returning successfully with a file descriptor value of 3, or 0x3 if you will.

Next on line 12, there is a dup2 call, with the descriptor value for bar.txt and then 0x1.

The man page for dup2 is somewhat awkwardly worded, but in short, this means “change whatever file descriptor 0x1 is pointing to, to whatever file descriptor 0x3 is pointing to”.

We already know 0x3 is a descriptor for bar.txt, but what about 0x1?

In POSIX any process has three standard streams made available by the host system, stdin, stdout and stderr, which by definition have the values 0, 1 and 2.

That means the dup2 call effectively changes the descriptor for stdout to point to the same thing as the descriptor for bar.txt. This is relevant, since cat reads files and writes them to the standard output.

On line 13 there is a close call on the descriptor for bar.txt. Now this may seem weird, since no data has actually been written to the file yet, but keep in mind this is only releasing the file descriptor. It doesn’t do anything to the file itself. Remember the descriptor for stdout now points to bar.txt, so the new descriptor is no longer needed and can just as well be made available to the system again.

Source file

The next lines of interest is 29-33.

On line 29, we again see another open call, but this time for foo.txt. Since the descriptor 0x3 was released on line 13, it is the first one available and is reused here.

On line 30-31 we see a read call on descriptor 0x3, which puts the content of foo.txt into memory, followed by a write on the stdout descriptor. Remembering stdout now points to bar.txt, we can assert the content of foo.txt has been written to bar.txt.

With line 32-33 a final read on the descriptor of foo.txt returns zero, which indicates end-of-file, followed by an immediate close.

On line 35, the last event from the child process closes stdin, with a call to close_nocancel.

Finally, on line 36, we see control return to the parent process with wait4, which waits for the child process to finish.

After this the log trace ends and the command is done.

Recap

So, to come full circle, when you enter a command like this:

cat foo.txt > bar.txt

What really happens behind the scenes, is the following:

  1. A child process is spawned from current process.
    1. The child process is transformed to a new process for cat via an exec type call.
    2. bar.txt is opened for writing, creating a new file descriptor.
    3. The file descriptor for stdout is made to point to bar.txt.
    4. The new descriptor is closed.
    5. foo.txt is opened for reading, creating a new file descriptor.
    6. A read to memory from the new descriptor of foo.txt is done.
    7. A write from memory to the descriptor of stdout is done.
    8. The new descriptor of foo.txt is closed.
    9. The descriptor of stdout is closed.
  2. Parent process waits for child to finish.
  3. Done.

It’s not all magic, but pretty close.

Further reading

References

Essential software for a fresh installation of Mac OS X

Following my recent decision to upgrade to Snow Leopard, being a bit old fashioned I decided a clean install would best quell my OCD. That of course means figuring out, what all those nifty little programs you’ve picked up along the way was.

Granted, this is rather a matter of personal preference, here is a short list of software I think is must have’s on a clean install of OS X:

  • Quicksilver
    Is a tool for accessing everything on your Mac incredibly fast. Just press Ctrl + Space, type a few letters of the title of the thing you need to find or open. Press Enter and voila.
  • Caffeine
    Is a little background application that allows you to toggle screen dimming. It puts a little icon in your task bar, that you just click whenever your want to watch a youtube clip or similar, where the screen dimming would otherwise be activated.
  • MacPorts
    Is a package manager for OS X, which gives you access to all kinds of open source software, that doesn’t ship with OS X. MacPorts relies on XCode being installed for a compiler, which can be installed from the OS X installation DVD. When it’s installed, using it is as simple as issuing the command:

    sudo port install

    Wait for it to finish compiling and installing and then you can run the program directly from your command-line.

  • Cyberduck
    A really good lightweight FTP client.
  • Adium
    For all your instant messaging needs. Handles most of the networks out there. No Skype support though.
  • Perian
    A collection of codecs that aren’t natively supported. If you want the preview feature in Finder to work, as well as QuickTime playback on non-supported file types, this is what you need.

Installing Mac OS X from a USB Disk

I have a Macbook Pro which is a couple of years old and signs of age are starting to show. I wanted to upgrade to Snow Leopard recently, but the SuperDrive just isn’t working very well anymore. Whenever I tried to boot from the installation DVD, it just made a couple of disgruntled noises and then spat out the disc.

I’ve had this issue before with some mediums it couldn’t read. Sometimes it helps just reinserting it a couple of times and eventually it will start reading the disc. Not this time around though. After trying about 6-7 times, my patience had the better of me.

Luckily I’ve found a workaround and it is dead simple.

  • Grab one of those spare USB drives you have lying about anyway.
  • Create a new partition of say 8GB with Disk Utility.
  • Clone  the Mac OS X install DVD onto that partition.
  • Reboot with the drive attached to your Mac.
  • Install Mac OS X.

The details of how to do it can be found in this blogpost.

Using ncurses in C for Text User Interfaces, featuring Xcode

Premise

Being the *nix fanboy that I am, I love having terminal access to my system. Most *nix based OS’s have the same base set of awesome command-line tools. The majority of these are simply “set and run” programs, but some have Text User Interfaces, (TUI), as well. A few of my favourites include screen, bmon, htop and lynx. Be sure to check those out if you haven’t already.

If you’ve ever written a small command-line program that relied on any kind of user input, you’ve probably already coded your own rudimentary menu system at some point. It’s really not that difficult, but.. things can quickly get messy and you’d soon wish you had found an easier way of handling terminal control. Enter ncurses (new curses), a library for writing terminal-independent TUIs.

The project

There’s quite a few run-of-the-mill tutorials for curses out there, but doing a traditional “Hello World!” program just feels so uninspired. Instead we are going to do a simplified version of the classic game Snake, let’s call it PieceOfCakeSnake. In PieceOfCakeSnake you win simply by playing, there is no opponents, no consumables and no way of dying. Just a single, fixed-size, snake moving around in it’s little box world. The game starts right away upon launch and Snakey, our main character, is moving happily along from the get-go. The game ends when ‘x‘ is pressed.

Hammer and chisel

For no particular reason, I’m going to use Xcode for PieceOfCakeSnake and write it in C. If you want to use another editor be my guest, it’s much the same since it’s going to be run in a regular terminal anyway.

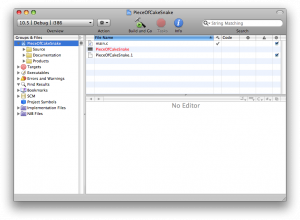
Now fire up Xcode and create a new project. Chose “Command Line Utility” > “Standard Tool”. Name the project and save it where you want.

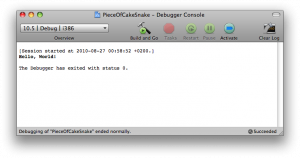
Xcode have already created a main.c file for us that simply outputs “Hello World!” and exits. Click “Run” > “Console” and click “Build and Go”. If all is well, the program builds without error and you should see something like this:

Now, ncurses comes native with Mac OS X, but for other systems you might need to install it beforehand. E.g. for Ubuntu there is the libncurses5 package.

There is still a little more to be done before we start coding. To get access to all the ncurses functions we have to tell the linker, to include the library at compile time. This is done by adding the line #include <ncurses.h> at the top of main.c and by supplying the linker flag -lncurses to the compiler. If you are compiling this from the terminal with GCC, the command would be:

gcc main.c -lncurses -o pocs main.c

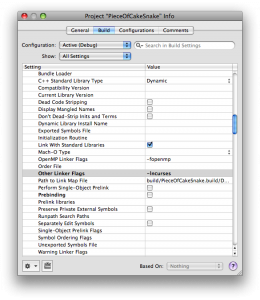
Where pocs is the resultant executable. In Xcode however, we rely on the provided build system and so, the linker flag is set in the project properties. Click “Project” > “Edit Project Settings”, chose the “Build” tab and find the field named “Other Linker Flags” and insert “-lncurses”.

That should do it, we are set to go.

Let’s see some code

In this first step, we’ll create a world for Snakey, a square box positioned in the middle of the terminal screen. Here’s the code:

#include 
 
#define WORLD_WIDTH 50
#define WORLD_HEIGHT 20
 
int main(int argc, char *argv[]) {
 
    WINDOW *snakeys_world;
    int offsetx, offsety;
 
    initscr();
    refresh();
 
    offsetx = (COLS - WORLD_WIDTH) / 2;
    offsety = (LINES - WORLD_HEIGHT) / 2;
 
    snakeys_world = newwin(WORLD_HEIGHT,
                           WORLD_WIDTH,
                           offsety,
                           offsetx);
 
    box(snakeys_world, 0 , 0);
 
    wrefresh(snakeys_world);
 
    getch();
 
    delwin(snakeys_world);
 
    endwin();
 
    return 0;
 
}

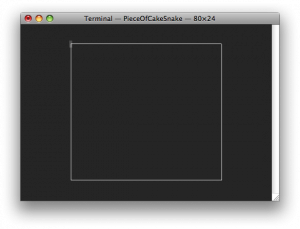
Running this example, you should see something like this:

Notice the WINDOW type. With ncurses everything is drawn on windows. By default, ncurses sets up a root window, stdscr, which backdrops the current terminal display.

To use it we call initscr(), which prepares the terminal for curses mode, allocates memory for stdscr and so forth.

The windows in ncurses are buffered, in the sense that you can do multiple drawing operations on a window, before making them show up on screen. To display the contents of a window in the actual terminal, the window needs to be refreshed.

For stdscr, this is done by calling refresh(), for child windows we use wrefresh(). This also shows the easy-to-remember naming convention used in the ncurses library – most functions that can be applied to stdscr, also has a counterpart, which applies to child windows, simply named by prepending a ‘w’ to the function name. E.g. refresh() and wrefresh(). We’ll se more of this in the finished version.

Instead of drawing the box manually, we take a shortcut by creating a new window and using the function box() to draw a border around the window. box() can use any displayable character to draw the borders. Using 0 defaults to a system specific line character.

Note: COLS and LINES are environment variables, that holds the current width and height of your terminal. That is the number of horizontal and vertical character positions available in the window.

The getch() function is simply there to pause program execution until some keyboard input is received. Thus a key press exits the program.

Functions delwin() and endwin() handles memory deallocation and returns the terminal to it’s former state. If these are omitted, the terminal will not behave as expected upon program termination and will probably need to be reset.

Time for some action

Now for the fun part – putting Snakey in his box and getting him to move about. Since this entry is about ncurses, I’m not going to go into the mechanics of the game itself. It’s a very simple implementation and the code should be rather self explanatory. You can download the source file here or just read from the following:

#include <ncurses.h>
 
#define TICKRATE 100
 
#define WORLD_WIDTH 50
#define WORLD_HEIGHT 20
 
#define SNAKEY_LENGTH 40
 
enum direction { UP, DOWN, RIGHT, LEFT };
 
typedef struct spart {
    int x;
    int y;
} snakeypart;
 
int move_snakey(WINDOW *win, int direction,
                snakeypart snakey[]);
 
int main(int argc, char *argv[]) {	
 
    WINDOW *snakeys_world;
    int offsetx, offsety, i, ch;
 
    initscr();
    noecho();
    cbreak();
    timeout(TICKRATE);
    keypad(stdscr, TRUE);
 
    printw("PieceOfCakeSnake v. 1.0  -  Press x to quit...");
 
    refresh();
 
    offsetx = (COLS - WORLD_WIDTH) / 2;
    offsety = (LINES - WORLD_HEIGHT) / 2;
 
    snakeys_world = newwin(WORLD_HEIGHT, 
                           WORLD_WIDTH, 
                           offsety, 
                           offsetx);
 
    snakeypart snakey[SNAKEY_LENGTH];
 
    int sbegx = (WORLD_WIDTH - SNAKEY_LENGTH) / 2;
    int sbegy = (WORLD_HEIGHT - 1) / 2;
 
    for (i = 0; i < SNAKEY_LENGTH; i++) {
        snakey[i].x = sbegx + i;
        snakey[i].y = sbegy;
    }
 
    int cur_dir = RIGHT;
 
    while ((ch = getch()) != 'x') {
        move_snakey(snakeys_world, cur_dir, snakey);
        if(ch != ERR) {
            switch(ch) {
                case KEY_UP:
                    cur_dir = UP;
                    break;
                case KEY_DOWN:
                    cur_dir = DOWN;
                    break;
                case KEY_RIGHT:
                    cur_dir = RIGHT;
                    break;
                case KEY_LEFT:
                    cur_dir = LEFT;
                    break;
                default:
                    break;
            }
 
        }
    }
 
    delwin(snakeys_world);
 
    endwin();
 
    return 0;
 
}
 
int move_snakey(WINDOW *win, int direction,
                snakeypart snakey[]) {
 
    wclear(win);
 
    for (int i = 0; i < SNAKEY_LENGTH - 1; i++) {
        snakey[i] = snakey[i + 1];
        mvwaddch(win, snakey[i].y, snakey[i].x, '#');
    }
 
    int x = snakey[SNAKEY_LENGTH - 1].x;
    int y = snakey[SNAKEY_LENGTH - 1].y;
    switch (direction) {
        case UP:
            y - 1 == 0 ? y = WORLD_HEIGHT - 2 : y--;
            break;
        case DOWN:
            y + 1 == WORLD_HEIGHT - 1 ? y = 1 : y++;
            break;
        case RIGHT:
            x + 1 == WORLD_WIDTH - 1 ? x = 1 : x++;
            break;
        case LEFT:
            x - 1 == 0 ? x = WORLD_WIDTH - 2 : x--;
            break;
        default:
            break;
    }
 
    snakey[SNAKEY_LENGTH - 1].x = x;
    snakey[SNAKEY_LENGTH - 1].y = y;
 
    mvwaddch(win, y, x, '#');
 
    box(win, 0 , 0);
 
    wrefresh(win);
 
    return 0;
}

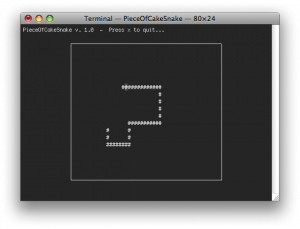
And here is what the game should look like in the terminal:


There is a few new ncurses functions being used here. Let’s start at the top. In main I’ve added:

noecho();
cbreak();
timeout(TICKRATE);
keypad(stdscr, TRUE);
printw("PieceOfCakeSnake v. 1.0  -  Press x to quit...");

From top to bottom. noecho() subverts the terminal from printing back the users key presses. This is useful, since otherwise we would quickly have a lot of garbage on-screen from using the arrow keys to guide Snakey.

cbreak() disables line buffering and feeds input directly to the program. If this wasn’t called, character input would be delayed until a newline was entered. Since we would like immediate response from Snakey, this is needed.

timeout() sets an input delay, in milliseconds, for stdscr, which is applied during input with getch() and sibling functions. If the user doesn’t input anything within this given time period, getch() returns with value ERR. Useful in this part of the code, where we would like Snakey to move, even when we are not pressing any keys.:

while ((ch = getch()) != 'x') {
    move_snakey(snakeys_world, cur_dir, snakey);
    if(ch != ERR) {
        ...
    }
}

The keypad() function enables or disables special input characters for a given window. F keys and arrow keys for example.

printw() works like the standard library function printf. That is print a given string at the current cursor location.

To separate things a little, we have an auxiliary function move_snakey(), which handles movement and redrawing of Snakey within the box. There is a few ncurses specific functions in there as well:

You could chose to add and remove individual characters if you want to be explicit, but I’m lazy, so I clear the whole window and redraw it again every time Snakey has moved. Clearing is done with clear() for stdscr and wclear() for child windows.

The last function to mention is mvwaddch(), which moves, notice mv, to coordinate x, y, in a child window, notice w, and adds a character at that position.

The mv prepend, like w, is also a part of the naming convention of ncurses. Thus most drawing operations have an extended version, that besides the item to be drawn, takes a set of coordinates of where to move the cursor before drawing it. E.g. printw() and mvprintw.

Goodbye Snakey

PieceOfCakeSnake is a very simple demonstration and only shows a very small subset of the features available with ncurses. For the inspired reader however, it should be no problem extending the game with a menu system, a scoreboard and more, using only the small part demonstrated here.

References and source

Ruby on Rails: Sphinx, thinking-sphinx and PostgreSQL on Mac OS X

Premise

On a project of mine, I needed a full text search feature and after a bit of digging, decided to go with Sphinx. It seems like a very proven search engine and with Rails, it’s easy to use through the thinking-sphinx plugin. Normally I just go with the standard SQLite database, if the application doesn’t require a high powered database backend. Unfortunately Sphinx does not yet work with SQLite and as far as I know, needs to run against either MySQL or PostgreSQL. The choice of either MySQL or PostgreSQL is a bit religious I feel. They are both battle hardened DBMS’s and I won’t make compelling argument towards either one. This time however, PostgreSQL is the favored candidate.

Requirements

Before starting, make sure you can compile custom software on your system. For this it is assumed you have the following installed:

PostgreSQL

First things first, we need to install our database server and enable access from rails. PostgreSQL is readily available through MacPorts, so open up a terminal and enter the following command:

sudo port install postgresql84 postgresql84-server

When that is done we need to add the bin folder of the PostgreSQL installation to our PATH:

nano ~/.bash_profile

And then, depending on where your MacPorts installation puts your ports, mine is under /opt/local, add the following line to the file:

export PATH=/opt/local/lib/postgresql84/bin:$PATH

Now we can start up the server using the following command:

sudo launchctl load -w /Library/LaunchDaemons/org.macports.postgresql84-server.plist

Or the shortcut version:

sudo port load postgresql84-server

This goes to the background and makes sure the server is started up again after reboot. Next we want to create a default database and make the server listen for connections:

sudo mkdir -p /opt/local/var/db/postgresql84/defaultdb
sudo chown -R postgres:postgres /opt/local/var/db/postgresql84
sudo su postgres
initdb -D /opt/local/var/db/postgresql84/defaultdb
pg_ctl -D /opt/local/var/db/postgresql84/defaultdb -l ~/postgresql.log start

The logfile postgresql.log is placed in /opt/local/var/db/postgresql84/.

Although I’m a fan of using the command line, I recommend using a tool such as pgAdmin for everyday administration tasks, such as adding new users etc.

Per default, you can login with postgres as user, with a blank password. This is the default superuser account so I suggest changing it sooner rather than later.

Sphinx

Now Sphinx is available through MacPorts as well, even with a postgresql84 variant. I’ve tried installing this version, but couldn’t seem to get through without error. Somehow it still maintained some library dependencies for mysql5 and thus wouldn’t compile. So, instead we opt for a manual installation. First we need to install a couple of dependencies for Sphinx. Download these two archives and extract their content:

You should now have two folders named expat-2.0.1 and libiconv-1.13. From a terminal, navigate to each folder and type the following commands:

./configure --prefix=/usr/local
sudo make && sudo make install

Now it’s time to install Sphinx. Download it and extract as before:

Navigate to the sphinx-0.9.9 folder and enter:

export LDFLAGS="-L/usr/lib"
./configure --prefix=/usr/local --with-pgsql --without-mysql
sudo make && sudo make install

And that is it for Sphinx.

thinking-sphinx

Assuming you already have a Rails project, install the thinking-sphinx plugin like so:

script/plugin install git://github.com/freelancing-god/thinking-sphinx.git

This will add a bunch of new features and a couple of rake tasks. Now, let’s say we have a model Employee, with first names and last names and we would like to be able to search employees by either one. In our model, we can define what we want to have indexed, using the define_index method:

class Employee < ActiveRecord::Base
 
    define_index do
        indexes first_name
        indexes last_name
        set_property :enable_star => true
        set_property :min_infix_len => 4
    end
 
end

The set_property calls, are to enable wildcard searching with asterisks, *, and to index substrings. Eg. If we have an employee named “McLovin”, then we would get matches on “McLo”, “cLov”, “Lovi” and so forth.

Before we can utilize these indices, we need to tell Sphinx to do an index run. In your projects directory, issue these two rake tasks:

rake thinking_sphinx:index
rake thinking_sphinx:start

The Sphinx server should now be running in the backround and in your controller, you can now search for Employee names like so:

class SomeController < ApplicationController
 
    def index
        @employee = Employee.search params[:first_name]
    end
 
end

For more detailed information, see the documentation for Sphinx and thinking-sphinx:

References