
My QNAP TS-559 Pro+ has been running faithfully since around 2010. It’s well past its end-of-life, but still perfectly capable of serving files. What it can’t do anymore is send email notifications. Not because the feature is broken, but because the internet moved on without it.
I used to have email notifications set up through my Google account, but some time around 2023-2024, this silently stopped working. I believe it was due to Google sunsetting basic authentication for SMTP in favor of OAuth.
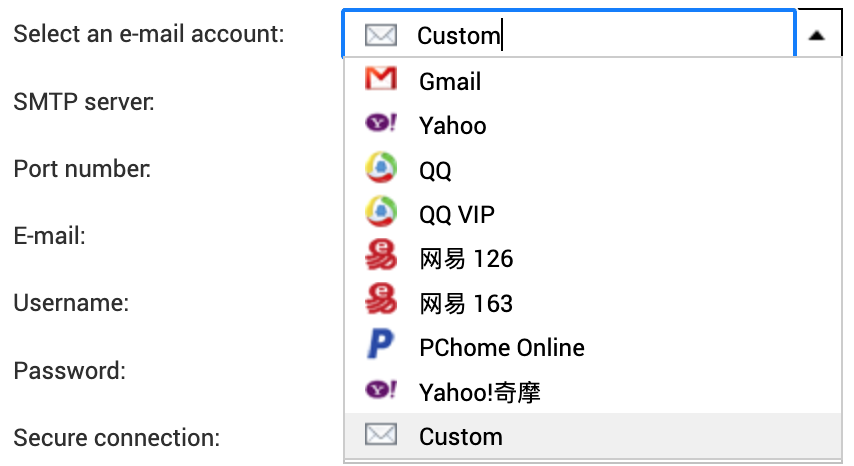
I did attempt to use a few of the other options, but Yahoo was a dud, and I gave up on trying the Chinese options. Even using Chrome’s built-in translation feature, it was pretty impossible to navigate any of those sites.
These days I tend to use Resend for transactional email, and they do what they can to accommodate most setups, even allowing you to connect on non-standard ports like 2465 and 2587. Despite that, every attempt to try to send through their SMTP relay would fail with the error message you see below.
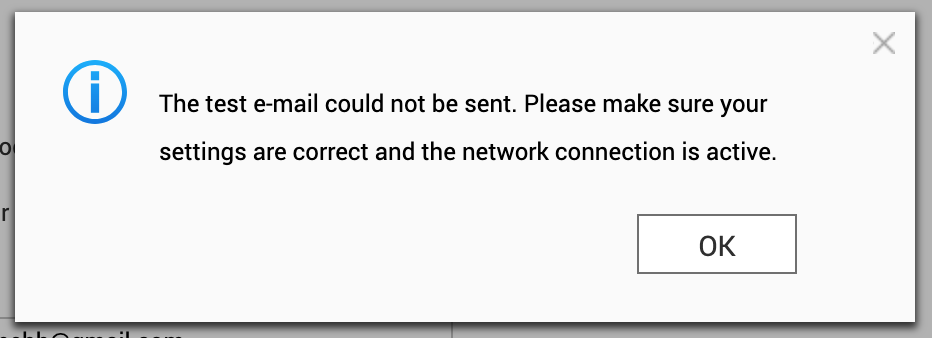
The built-in log which can be accessed through the UI, was just a repeat of the same message. Not much to go by really. Time to to crack this one open, and see if more could be revealed directly on the machine.
First theory: ancient OpenSSL
I’m no expert on SMTP, but there’s some TLS in there somewhere, and OpenSSL seems to always be part of any Linux cryptography stack, so it goes to reason to look there first:
[~] # openssl version
OpenSSL 1.0.1u  22 Sep 2016
My first thought was that this version might simply be too old and if used by the mailsender of the system, maybe it couldn’t speak modern TLS.
The final firmware update for the device was 4.2.6 build 20240618, so under two years old at the time of writing. QNAP has officially stopped supporting it this device though, so there’s not much hope for getting it updated from official channels.
To test this, I tried connecting directly to the resend smtp server with openssl s_client, but that immediately uncovered another issue: the NAS didn’t trust modern certificates.
Let’s Encrypt uses the ISRG Root X1 certificate, which older devices don’t have in their trust store:
[/etc/ssl/certs] # openssl s_client -connect smtp.resend.com:465 -tls1_2
CONNECTED(00000003)
depth=1 C = US, O = Let's Encrypt, CN = E8
verify error:num=20:unable to get local issuer certificate
verify return:0
---
Certificate chain
 0 s:/CN=*.resend.com
   i:/C=US/O=Let's Encrypt/CN=E8
 1 s:/C=US/O=Let's Encrypt/CN=E8
   i:/C=US/O=Internet Security Research Group/CN=ISRG Root X1
---
...
Verify return code: 20 (unable to get local issuer certificate)
---
220 Resend SMTP Relay ESMTP
There it is:
Verify return code: 20 (unable to get local issuer certificate)It didn’t have the ISRG Root X1 in its trust store. The TLS handshake completes (OpenSSL continues by default), but a properly configured mail client would likely reject this.
To test the theory, I downloaded the missing root certificate. Of course, letsencrypt.org also uses a certificate signed by ISRG Root X1, so fetching the certificate itself can’t be done securely.
[/etc/ssl/certs] # curl -o ISRG_Root_X1.pem https://letsencrypt.org/certs/isrgrootx1.pem
curl: (60) SSL certificate problem: unable to get local issuer certificate
[/etc/ssl/certs] # curl -k -o ISRG_Root_X1.pem https://letsencrypt.org/certs/isrgrootx1.pem
I had to look up how to add a root certificate, but luckily it’s not complicated:
[/etc/ssl/certs] # openssl x509 -hash -noout -in ISRG_Root_X1.pem
4042bcee
[/etc/ssl/certs] # ln -s ISRG_Root_X1.pem 4042bcee.0
Then onto testing again:
[/etc/ssl/certs] # openssl s_client -connect smtp.resend.com:465 -tls1_2
CONNECTED(00000003)
depth=2 C = US, O = Internet Security Research Group, CN = ISRG Root X1
verify return:1
depth=1 C = US, O = Let's Encrypt, CN = E8
verify return:1
depth=0 CN = *.resend.com
verify return:1
---
Certificate chain
 0 s:/CN=*.resend.com
   i:/C=US/O=Let's Encrypt/CN=E8
 1 s:/C=US/O=Let's Encrypt/CN=E8
   i:/C=US/O=Internet Security Research Group/CN=ISRG Root X1
---
...
New, TLSv1/SSLv3, Cipher is ECDHE-ECDSA-AES128-GCM-SHA256
...
Verify return code: 0 (ok)
---
220 Resend SMTP Relay ESMTP
The NAS’s OpenSSL could now verify the certificate chain and negotiate TLS 1.2 with a modern cipher. Seeing the the SMTP banner meant the original theory was disproved: the old OpenSSL wasn’t the problem after all.
I wasn’t any closer to be sending emails though.
Finding the real culprit: ssmtp
I didn’t really have any clue what the mail delivery mechanism used on the machine was at this point, but I randomly stumbled upon this reddit post, with a very similarly sounding problem to mine, which mentioned ssmtp.
sSMTP is a program which delivers email from a local computer to a configured mailhost (mailhub). It is not a mail server (like feature-rich mail server sendmail) and does not receive mail, expand aliases or manage a queue. One of its primary uses is for forwarding automated email (like system alerts) off your machine and to an external email address.
Sounds exactly like what I was looking for. Finding a /etc/ssmtp folder as welll seemed to confirm it.
To recap then – the NAS’s OpenSSL could do TLS 1.2 as we just saw, but whether ssmtp could, might be a different story.
I configured /etc/ssmtp/ssmtp.conf to use Resend as I’d done previously. I belive this file is directly edited, when updating settings in UI as well:
[email protected]
mailhub=smtp.resend.com:587
AuthUser=resend
AuthPass=re_xxxxx
UseSTARTTLS=YES
Then ran a test with verbose output:
[/etc/ssl/certs] # echo -e "Subject: Test from ssmtp\n\nThis is a test." | ssmtp -v "[email protected]"
[<-] 220 Resend SMTP Relay ESMTP
[->] EHLO localhost
[<-] 250 SIZE 41943040
[->] STARTTLS
[<-] 220 Ready to start TLS
SSL_connect: Success
ssmtp: Cannot open smtp.resend.com:587
SSL_connect: Success followed immediately by failure. The SMTP conversation starts fine, STARTTLS is accepted, and then nothing. The connection dies and ssmtp reports a generic error.
The system’s OpenSSL could negotiate TLS 1.2 with modern ciphers, so maybe it was ssmtp that was to old, or compiled against an older version of the SSL library. It could also be that it wasn’t passed the right parameters, or had some other limitation that prevented it from completing the handshake.
[~] # ssmtp -V
sSMTP 2.64 (Not sendmail at all)
The ssmtp (2.64-12) seems to be the latest stable shipped in Debian, so maybe this was a dead end as well.
I could potentially cross-compile a newer ssmtp or use a different mail client, but at this point I was looking for a solution, not a project.
A local SMTP relay
I gave up on ssmtp and decided to look for alternatives. I was still convinced that this had something to do with encryption, so I decided to stop trying to make the NAS do something it couldn’t and instead, I set up a neighbouring Raspberry Pi as an SMTP relay like so:

The Pi accepts unauthenticated SMTP on port 25 from the local network, and only the ip of the NAS, then forwards everything to Resend using modern TLS and API key authentication. The NAS only needs to speak plain SMTP to a local IP address. Something I had a hunch it could still do just fine.
Postfix Configuration
I wrote an Ansible playbook to configure Postfix on the Pi and test with swaks:
---
- name: Configure Postfix SMTP Relay
  hosts: offsite
  become: yes
  vars:
    local_network: "192.168.0.0/24"
  vars_files:
    - default.yaml

  tasks:
    - name: Install postfix, SASL modules, and swaks
      ansible.builtin.apt:
        name:
          - postfix
          - libsasl2-modules
          - swaks
        state: present
        update_cache: yes

    - name: Deploy main.cf configuration
      ansible.builtin.template:
        src: templates/main.cf.j2
        dest: /etc/postfix/main.cf
        owner: root
        group: root
        mode: '0644'
      notify: Restart postfix

    - name: Create SASL password file
      ansible.builtin.copy:
        content: "[smtp.resend.com]:465 resend:{{ resend_api_key }}"
        dest: /etc/postfix/sasl_passwd
        owner: root
        group: root
        mode: '0600'
      notify:
        - Hash SASL password file
        - Restart postfix

    - name: Ensure postfix is enabled and started
      ansible.builtin.systemd:
        name: postfix
        enabled: yes
        state: started

    - name: Flush handlers before test
      ansible.builtin.meta: flush_handlers
      when: test_email is defined

    - name: Send test email via relay
      ansible.builtin.command:
        cmd: >
          swaks
          -4
          --to {{ test_email }}
          --from [email protected]
          --server 127.0.0.1
          --port 25
          --header "Subject: Postfix relay test from {{ ansible_hostname }}"
          --body "Test email sent via Postfix SMTP relay at {{ ansible_date_time.iso8601 }}"
      when: test_email is defined
      register: swaks_result

    - name: Show test result
      ansible.builtin.debug:
        var: swaks_result.stdout_lines
      when: test_email is defined

  handlers:
    - name: Hash SASL password file
      ansible.builtin.command: postmap /etc/postfix/sasl_passwd
      notify: Set permissions on hashed file

    - name: Set permissions on hashed file
      ansible.builtin.file:
        path: /etc/postfix/sasl_passwd.db
        owner: root
        group: root
        mode: '0600'

    - name: Restart postfix
      ansible.builtin.systemd:
        name: postfix
        state: restarted
Here’s the core of the configuration for Postfix.
# Accept connections from local network
inet_interfaces = all
inet_protocols = ipv4
mynetworks = 127.0.0.0/8 192.168.0.0/24

# Don't deliver locally - relay only
mydestination =
local_transport = error:local delivery disabled

# Relay to Resend with implicit TLS (port 465)
relayhost = [smtp.resend.com]:465
smtp_tls_wrappermode = yes
smtp_tls_security_level = encrypt

# Authenticate with Resend API key
smtp_sasl_auth_enable = yes
smtp_sasl_password_maps = hash:/etc/postfix/sasl_passwd
smtp_sasl_security_options = noanonymous
The SASL password file maps the relay host to credentials:
[smtp.resend.com]:465 resend:re_xxxxxDebugging the relay
Getting the relay working had its own challenges. In the playbook I had included a test task using swaks to send a test email to a specified sender. (Email replaced).
ansible-playbook -i inventory.ini --ask-vault-pass smtp-relay.yml -e [email protected]The first run failed immediately:
*** Error connecting to localhost:25:
***     IO::Socket::INET6: connect: Connection refused
Postfix was configured for IPv4 only (inet_protocols = ipv4), but swaks tried IPv6 first. Fixed by forcing IPv4:
swaks -4 --server 127.0.0.1 --port 25 ...The next error was more interesting:
SASL authentication failed; server smtp.resend.com said: 535 API key not foundI had forgotten to populate the ansible vault with the actual API key. After fixing that and running postmap to rehash the password file, the next attempt revealed:
550 Invalid `from` field. The email address needs to follow the
`[email protected]` or `Name <[email protected]>` format.
Resend requires a valid sender address from a verified domain. postfix@pi (the Pi’s hostname) wasn’t going to work. Updated the test to use [email protected] and finally saw success in the logs:
Jan 27 08:19:11 pi postfix/smtp[24469]: 60FE24BEA9:
  to=<[email protected]>, relay=smtp.resend.com[54.205.195.44]:465,
  delay=1.4, delays=0.06/0.11/0.76/0.46, dsn=2.0.0,
  status=sent (250 aa286343-94c8-4904-bd40-79042a612762)
Finally!
Configuring the NAS
With the relay working, I configured the NAS’s SMTP settings:
- SMTP Server: 192.168.0.x (the Pi’s IP)
- Port: 25
- Authentication: None
- Encryption: None
The NAS trusts the local network, and the relay handles everything else.
Result
I triggered a test notification from the NAS admin panel:
From: noreply <[email protected]>
To: me

Server Name: ts-559
IP Address: 192.168.0.x
Date/Time: 2026/01/27 08:54:51

This is a test mail sent by NAS (ts-559).
And et voilà, it arrived in my inbox a few seconds later.
Conclusion
Sometimes teaching an old dog new tricks simply isn’t the way to go. Maybe it just needs a bit of support.