lazy-images-rails or: How I Learned to Stop Worrying and just wrote a Rails plugin

I worry

One thing that really bugs me, which apparently seems a ubiquitous trend on the web today, is the ever increasing size and sluggishness of many web pages. Why optimise for speed and effectiveness when you can plaster your users with megabytes of Javascript and a plethora of huge images? Surely we as developers shouldn’t bother ourselves with concerns of such trivial nature. Network technology will save us, right?

No.

You can strap a rocket to a turd, but that doesn’t make it a spaceship.

One part of it is surely monstrous asset packages, but another just as important part is images. Does this look familiar?

KyTy8LV

Succinctly, reddit user ReadyAurora5 puts it beautifully:

The fury this incites in me is unhealthy. I want to find whoever was responsible for this, tie him/her up and give them a touchscreen that says: Should you be let go? YES or NO… with absolute assurance that which ever they click on will be fulfilled. I’m leaving it completely up to them. Of course they’ll click yes, but when they go to, IT FUCKING MOVES TO ‘NO’ HAHAHAHA. NOW DO YOU SEE!? REAL FUCKIN’ FUNNY ISN’T IT!?

Sorry…I lost myself there.

So what to do?

I worry no more

On a personal project I decided to deal with the image part of the problem. The solution I decided to go with, was to simply have inline SVG placeholders, with the exact dimensions of the target image. Inlining the placeholders directly in the markup adds the benefit of instantly taking up the required space on a page instead of having to wait for another round-trip to fetch the image from the server.

I’m aware that the same effect can be achieved by explicitly setting the width and height attributes of the img tag. The downside of that however, is that it will leave a blank space on the page until the image has been loaded. Aside from this, even if you know the desired size of the image, you might want it to scale with the width of it’s parent container. For square images, the ratio is all the same, so you shouldn’t have to specify a height. This also makes the solution easier in this case. Simply insert an element that renders and scales the same way as the image and replace once it’s ready.

I’m almost certainly not the first to do it this way, but I couldn’t immediately find a ready made drop-in solution for Rails.

For another CSS based solution using bottom padding, see Related below.

The plugin

There’s a more thorough explanation in the project readme, but the main idea for the plugin was to have this functionality added, with the least amount of intrusion into the consuming application.

To achieve this, when including the gem, the Rails image_tag helper is aliased so instead of a bare img tag, a wrapped SVG is inserted instead, along with the necessary data for lazy-loading the image in-place.

A smidgen of javascript is then used to trigger the lazy-load on document ready, but basically that’s it.

Give it a look-see and take it for a spin the next time you want to fill your site with a bunch of images.


GitHub

https://github.com/rhardih/lazy-images-rails

RubyGems

https://rubygems.org/gems/lazy_images-rails

Here’s a different solution to the same problem by Corey Martin on aspiringwebdev.com.
Ruby on Rails Gotcha: Asynchronous loading of Javascript in development mode

Everyone knows that you shouldn’t block page rendering by synchronously loading a big chunk of javascript in the head of your page right? Hence you might be tempted to change the default Javascript include tag, from this:

<%= javascript_include_tag 'application' %>

To this:

<%= javascript_include_tag 'application', async: true %>

Which makes perfect sense, when serving all Javascript in one big file, as is the case in production, meaning everything is defined at the same time. What about development though?

Well, in development rails is kind enough to let you work on individual Javascript files, which means it will recompile only as needed, when a single file is changed. To this effect, each file is included separately via their own script tag in the header. E.g:

<script src="/assets/jquery-87424--.js?body=1"></script>
<script src="/assets/jquery_ujs-e27bd--.js?body=1"></script>
<script src="/assets/turbolinks-da8dd--.js?body=1"></script>
<script src="/assets/somepage-b57f2--.js?body=1"></script>
<script src="/assets/application-628b3--.js?body=1"></script>

* Tags intentionally shortened in example.

There is a subtlety here that is quite important. All the scripts are loaded synchronously, one after the other, as specified by the order they appear in the application.js manifest. This means we’re guaranteed that jQuery, etc. is available once we get to our own scripts.

Now consider the the same scripts, but with async=true:

<script src="/assets/jquery-87424--.js?body=1" async="async"></script>
<script src="/assets/jquery_ujs-e27bd--.js?body=1" async="async"></script>
<script src="/assets/turbolinks-da8dd--.js?body=1" async="async"></script>
<script src="/assets/somepage-e23b4--.js?body=1" async="async"></script>
<script src="/assets/application-628b3--.js?body=1" async="async"></script>

Since all scripts in this case is loaded *asynchronously*, all previous guarantees are now lost, and we’ll very likely start seeing errors like this:

Uncaught ReferenceError: $ is not defined

Oops!

The fix is simple though: Don’t load Javascript assets asynchronously in development mode!

Here’s one way of doing it:

<%= javascript_include_tag 'application', async: Rails.env.production? %>

Happy hacking!

Rails 4 how to: User sign up with email confirmation in five minutes, using Devise and Mailcatcher

Sometimes you might find yourself wanting to quickly prototype an application that requires user sign ups. Here’s a quick guide to setting up a new rails application with user signup and email confirmation.

Example project available here: https://github.com/rhardih/rails4-with-user-signup. Each step below will be annotated with a commit linked on Github.

Set up a new rails project

  1. rails new rails4-with-user-signup -d postgresql
  2. cd rails4-with-user-signup
  3. bin/rake db:create
  4. bin/rails s

If you’re on OS X using PostgreSQL, you might see this error intially:

could not connect to server: No such file or directory Is the server running locally and accepting connections on Unix domain socket “/var/pgsql_socket/.s.PGSQL.5432”?

One extra step adjusting the config/database.yml is needed. Just uncomment the host option and you should be good to go. If you go to http://localhost:3000, you should see the familiar “Welcome aboard, You’re riding Ruby on Rails!” message page.

Commits d991a6b8d2f4.

Add Devise for user sign up and authentication

  1. Follow the Getting Started section of the Devise README. Commits be1c60be34ad3625cd.
  2. Then follow the the Devise wiki page for adding :confirmable to Users. Commits eedaab862a3e2733d84ee44b.
  3. Additonally, to make sure you can actually send email in development mode, add the following options to config/environments/development.rb:
    config.action_mailer.default_url_options = { host: ‘localhost’, port: 3000 }
    config.action_mailer.delivery_method = :smtp
    config.action_mailer.smtp_settings = {:address => “localhost”, :port => 1025} 

    Commit: 35e177.

Setup and run Mailcatcher to capture Devise sign up emails

  1. Install: gem install mailcatcher
  2. Run: mailcatcher

Test run

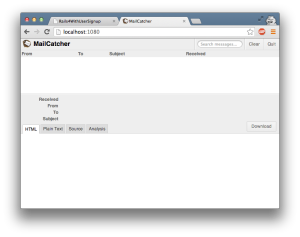
Open another tab at http://localhost:1080, where you can see the mailcatcher interface with an empty mail queue.

Screen Shot 2014-06-03 at 7.57.56 PM

Now go to http://localhost:3000/users/sign_up and create a new user.

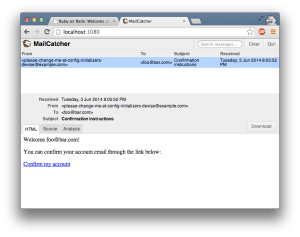
Check again in the mailcatcher interface. You should now see an email with the subject “Confirmation instructions”.

Screen Shot 2014-06-03 at 8.06.06 PM

Congratulations! You’ve just set up a a new rails application with user sign up, authentication and email confirmation.

Ruby on Rails: Sphinx, thinking-sphinx and PostgreSQL on Mac OS X

Premise

On a project of mine, I needed a full text search feature and after a bit of digging, decided to go with Sphinx. It seems like a very proven search engine and with Rails, it’s easy to use through the thinking-sphinx plugin. Normally I just go with the standard SQLite database, if the application doesn’t require a high powered database backend. Unfortunately Sphinx does not yet work with SQLite and as far as I know, needs to run against either MySQL or PostgreSQL. The choice of either MySQL or PostgreSQL is a bit religious I feel. They are both battle hardened DBMS’s and I won’t make compelling argument towards either one. This time however, PostgreSQL is the favored candidate.

Requirements

Before starting, make sure you can compile custom software on your system. For this it is assumed you have the following installed:

PostgreSQL

First things first, we need to install our database server and enable access from rails. PostgreSQL is readily available through MacPorts, so open up a terminal and enter the following command:

sudo port install postgresql84 postgresql84-server

When that is done we need to add the bin folder of the PostgreSQL installation to our PATH:

nano ~/.bash_profile

And then, depending on where your MacPorts installation puts your ports, mine is under /opt/local, add the following line to the file:

export PATH=/opt/local/lib/postgresql84/bin:$PATH

Now we can start up the server using the following command:

sudo launchctl load -w /Library/LaunchDaemons/org.macports.postgresql84-server.plist

Or the shortcut version:

sudo port load postgresql84-server

This goes to the background and makes sure the server is started up again after reboot. Next we want to create a default database and make the server listen for connections:

sudo mkdir -p /opt/local/var/db/postgresql84/defaultdb
sudo chown -R postgres:postgres /opt/local/var/db/postgresql84
sudo su postgres
initdb -D /opt/local/var/db/postgresql84/defaultdb
pg_ctl -D /opt/local/var/db/postgresql84/defaultdb -l ~/postgresql.log start

The logfile postgresql.log is placed in /opt/local/var/db/postgresql84/.

Although I’m a fan of using the command line, I recommend using a tool such as pgAdmin for everyday administration tasks, such as adding new users etc.

Per default, you can login with postgres as user, with a blank password. This is the default superuser account so I suggest changing it sooner rather than later.

Sphinx

Now Sphinx is available through MacPorts as well, even with a postgresql84 variant. I’ve tried installing this version, but couldn’t seem to get through without error. Somehow it still maintained some library dependencies for mysql5 and thus wouldn’t compile. So, instead we opt for a manual installation. First we need to install a couple of dependencies for Sphinx. Download these two archives and extract their content:

You should now have two folders named expat-2.0.1 and libiconv-1.13. From a terminal, navigate to each folder and type the following commands:

./configure --prefix=/usr/local
sudo make && sudo make install

Now it’s time to install Sphinx. Download it and extract as before:

Navigate to the sphinx-0.9.9 folder and enter:

export LDFLAGS="-L/usr/lib"
./configure --prefix=/usr/local --with-pgsql --without-mysql
sudo make && sudo make install

And that is it for Sphinx.

thinking-sphinx

Assuming you already have a Rails project, install the thinking-sphinx plugin like so:

script/plugin install git://github.com/freelancing-god/thinking-sphinx.git

This will add a bunch of new features and a couple of rake tasks. Now, let’s say we have a model Employee, with first names and last names and we would like to be able to search employees by either one. In our model, we can define what we want to have indexed, using the define_index method:

class Employee < ActiveRecord::Base
 
    define_index do
        indexes first_name
        indexes last_name
        set_property :enable_star => true
        set_property :min_infix_len => 4
    end
 
end

The set_property calls, are to enable wildcard searching with asterisks, *, and to index substrings. Eg. If we have an employee named “McLovin”, then we would get matches on “McLo”, “cLov”, “Lovi” and so forth.

Before we can utilize these indices, we need to tell Sphinx to do an index run. In your projects directory, issue these two rake tasks:

rake thinking_sphinx:index
rake thinking_sphinx:start

The Sphinx server should now be running in the backround and in your controller, you can now search for Employee names like so:

class SomeController < ApplicationController
 
    def index
        @employee = Employee.search params[:first_name]
    end
 
end

For more detailed information, see the documentation for Sphinx and thinking-sphinx:

References